
Cabinet Unit Construction
The build of a universal cabinet unit with materials and proportions adapted for Van Conversions
The premise for this entire build guide is to deliver a quality van conversion at low cost, with simple building methods and without complicated and/or expensive machinery.
Low Cost
A professional van build requires professionals from every trade where hourly wages easily go beyond $100/hr; now imagine a 6-8 month build period. It should be pretty clear, that by just doing all the labor yourself you can expect to save many tens of thousands over an outsourced build.
Basic Tools
You can create an acceptable DIY conversion with basic tools. A real quality build is only possible with a lot of basic tools (look here at some of the tools I used) and some professional woodworking machines.
Simplicity
Spending large amounts on professional woodworking machines, like tablesaws, jointers and planers should be out-of-the-question. So look here for simple alternatives; these can produce similar results with a little more effort. My advice: before you start, make as many jigs as necessary to create straight cuts at right angles.
So what is a Base Cabinet Unit?
To keep things simple, I decided to put the necessary buildings blocks, such as the kitchen, fridge, fresh water tank and toilet block inside their own standard cabinet.
Most base units will have predetermined measurements such as 23″ and 35″ high and 16″ wide; I chose 16″ depth, to maximize the floor space. But remember, these sizes are supposed to be adjusted to your specific requirements.
You can also combine different cabinets into one; it’s your choice, your build.
Materials
Most wood consists of resawn 2×4’s and plywood; both readily available at your local DIY store. Wood is easy to handle and with a little effort, converted into straight pieces that will assemble into quality cabinets with drawers and doors.
Alternatively, the 80/20 aluminum extrusion system can be used instead. It is easier to install and looks professional, but brings its own complications and it adds several thousand dollars to the cost of the build1.

Always minimize the thickness of wood or leave it out where not seen and not necessary for the stiffness of the cabinet, to save on cost and more importantly on weight. Use stainless steel fasteners wherever possible; they hold up better in a high-humidity environment of a Van.
A good source for affordable fasteners is The Bolt Depot.
Ultimately the cabinets will receive their exterior finish; all remaining exposed surfaces get sealed with a poly-urethane and will be attached to the plywood floor with screws and directly to the metal walls with plusnuts (video).
Ultimately the cabinets will receive their exterior finish; all remaining exposed surfaces get sealed with a poly-urethane and will be attached to the plywood floor with screws and directly to the metal walls with plusnuts (video).

How To Build & Install
Read through and understand this entire project first and then decide the optimal placement of the cabinet, its material finish and all the desired components. Always keep in mind serviceability.
Before you start with any project, create a detailed (provisional) layout in SketchUp, a free browser-based 3D design program. This is a bit time-consuming to learn, but well worth it.
Have a good idea about what appliances you want to install and where, then adjust the cabinet dimensions accordingly.
Decide the base depth of your most commonly used cabinets.
Cabinet Size Comparison
Standard Base Cabinet
16″L x 23″H x 16″D
Example Water Tank Cabinet
48”L x 23″H x 16”W (21gal)
Materials
Wood Glue
waterproof
interior/exterior
Tools
Wood Glue
waterproof
interior/exterior
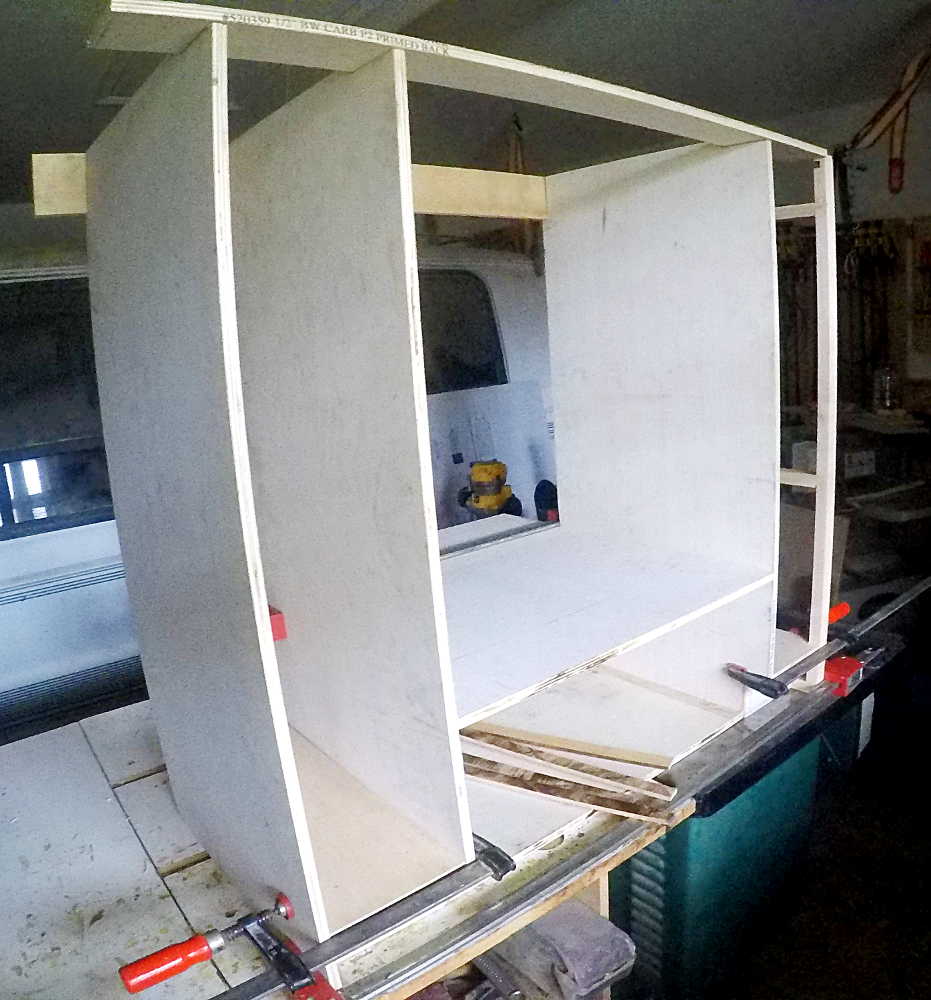
Cabinet Unit Assembly
Now, let’s build a standard base cabinet (16″L x 23″H x 16″D or adjust to your own measurements).
The following goes into great detail for those without prior wood working experience. Read disclaimer below first.
- Toe kick (i.e. at kitchen area).
- Cut a 2×4 piece to 16″ length.
- Cut a 2×4 piece to depth – 3.5″ (is 16″-3.5″ = 12.5″).
- Cut 0.25″ from each side of the width of both 2×4 pieces, so that a 3″ width remains (the height of the toe kick).
- Cut each 2×4 piece lengthwise into 2 pieces, each ~0.75″W x 3″H.
- Use two wood clamps to create a square out of the 4 pieces, with the longer pieces front and back and the shorter ones left and right in between.
- Glue all 4 pieces together (verify that everything is square, by measuring between both opposite corners; those distances should be equal.
- After it has dried, re-enforce each corner with 2 pre-drilled, sunken crews.

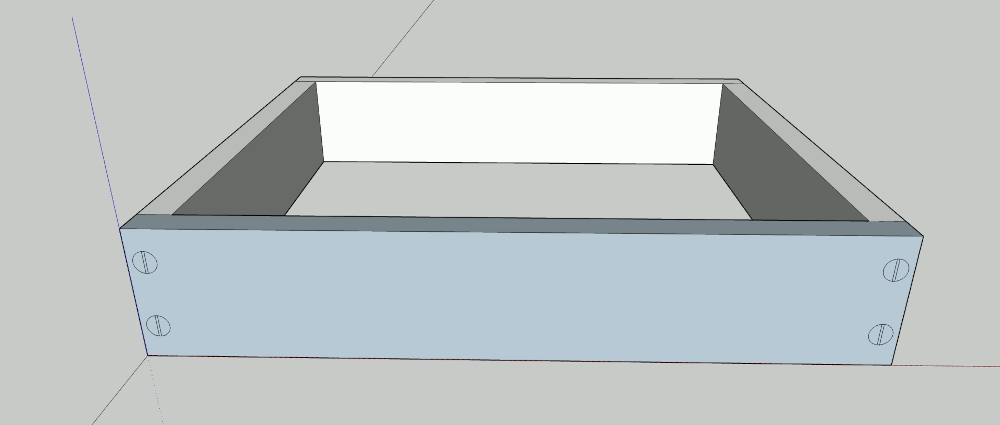
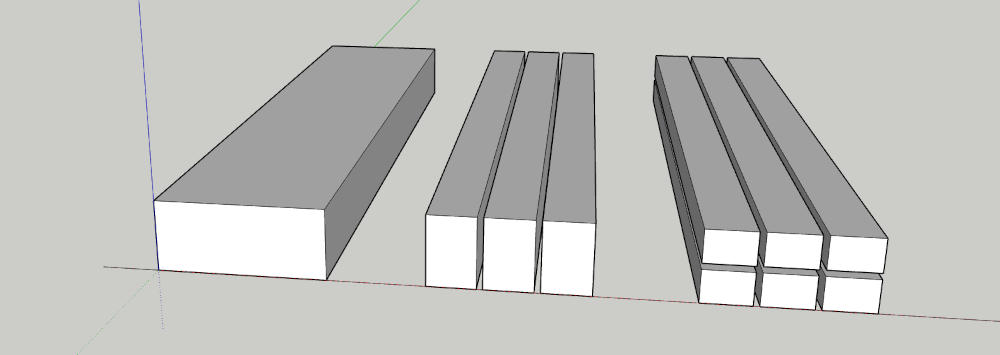
- Cabinets
- Frame Stiles (0.75W” x 1″H)
- Cut a piece of 2×4 to the desired frame length (or slightly longer and cut to length later).
- Cut the 2×4 lengthwise into three 1″ x 1.5″ pieces.
- Cut each piece through the middle.
- Now you have six 0.75″ x 1″ frame pieces.
- End Walls
- Use 0.5″ plywood for sturdiness and so you can attach something like a picture frame.
- Remove bottom front corner, if the cabinet uses a toe kick.
- Interior Walls
- Use 0.25″ plywood to reduce weight.
- Remove bottom front corner, if the cabinet uses a toe kick.
- Optional Toe Kick
- Add 0.5″ ply between the cabinet and the toe kick frame.
- Deduct 3″ from the overall height of the cabinet.

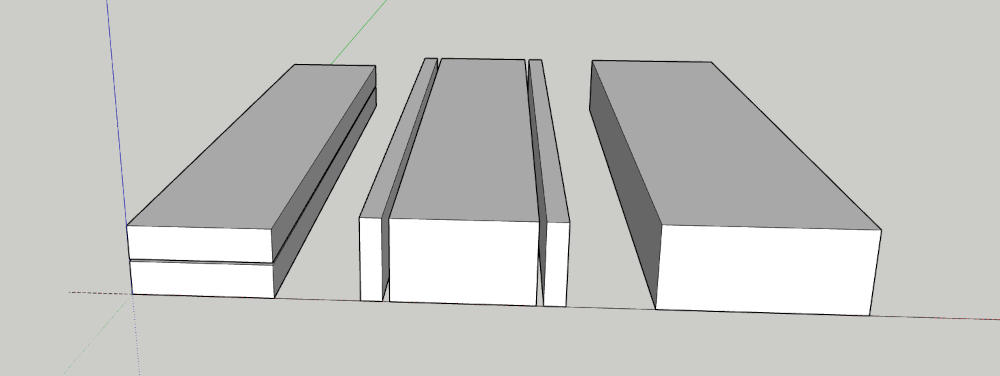
- Top Boards
- Cut a 2×4 to the appropriate board length.
- Reduce the 3.5″ side to 2.5″ by trimming both sides of the 2×4 on the tablesaw.
- Cut the remainder lengthwise to two pieces of 0.5″ x 2.5″.
- Cabinet Assembly
- Front & Back Frames
- Place a 16″ frame stile at the bottom of the frame, with 1″ height, front facing.
- Add two vertical stiles on each end, with a length of the height between bottom stile and the location of the first drawer slide or at least every 16″.
- Add a horizontal stile, identical to the bottom stile.
- Continue building the front frame upwards and finish with a horizontal top board (2.5″W x 0.5″H x 16″L). Use an identical vertical top board at the top of the back frame.
Make cut-outs into the top of the side panels, to accommodate the side boards.
*if you use a toe kick, lay your bottom stile on top of a 0.5″ plywood bottom cabinet panel.
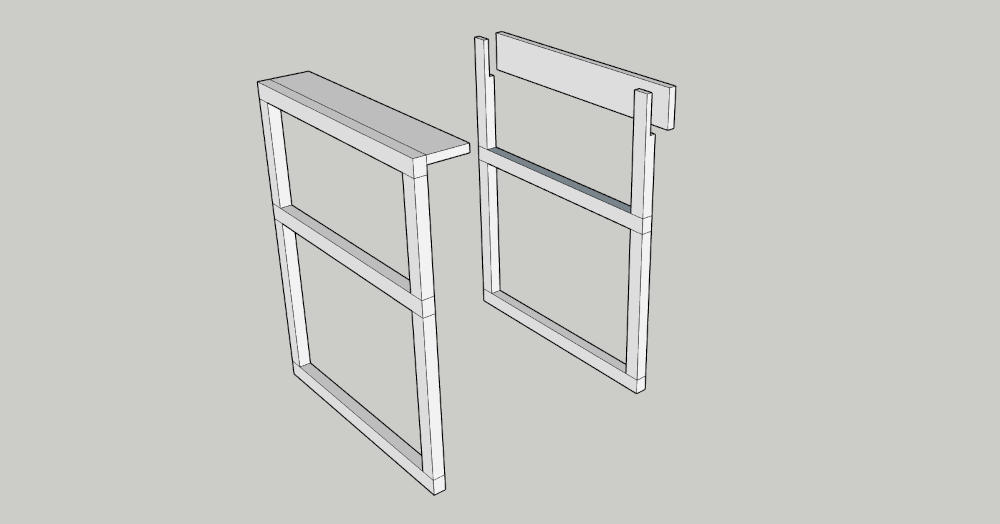
- Side Frames
- At every location of a front/back horizontal stile, also glue a side stile onto each of the plywood side panels.
- Assembly
- Glue the front & back frames and the side panels together and re-enforce with pre-drilled, sunken screws.
*continually check for squareness with building square and/or tape measure.

- Cabinet Doors
- In case you substitute drawers with doors, add a vertical filler strip along the front edge of each of the side panels to accommodate European hinges.
Use the front, horizontal top board to attach a possible countertop and the back, vertical top board to lock the cabinet against the (metal) back wall of the vehicle with a plusnut (video). Fasten the cabinets to the floor with screws.
Tips:
► Whenever you can, leave rear, top and/or bottom open, to lower material cost and weight.
► Use Formica, edge banding and/or paint to finish the cabinets.
► Construction of all the cabinets in one row at the same time, will save you a lot of time and is easier to put together.
materials
- 0.5” plywood
- 0.25″ plywood
- 2×4’s
- wood glue
- screws
- plusnuts
- poly-urethane
- finish materials:
Formica, edge banding or paint, etc.
tools
- drill
- tablesaw
- screw ?plunger?
- wood clamps
- building square
building methods:
– create a provisional layout SketchUp
– before start building, have a good idea about what appliances you want to install and adjust the cabinets accordingly. Show new page with appliances.
– propane or ‘electric’ van
– add page about 8020 in “Cabinet Unit Construction” page.
The following video gives a general idea of a similar build.


BUILD GUIDE UPDATE
Be the first to receive an update, when a new Project is added to this Build Guide. I also include a monthly overview of newly posted videos.
Fresh Water Tank Project
Choose your Mod or build this project in the following order.
Part I
Base Cabinet
Implementation of an example base unit.

In this Build Guide ‘base cabinet units’ are used as individual units, which contain most or all components dedicated to a specific function, such as water supply, kitchen plumbing, battery storage, fridge unit, etc.
Part II
Water Pump
Installation of the water pump.

The water pump to be located preferably inside the cavity under the water tank and next to the rear wheel well, as long as it is readily accessible. A strainer before the pump removes debris and a check valve protects the water in the tank.
QUESTIONS, SUBMISSIONS OR CORRECTIONS
The missing parts of the complete van conversion process are being added regularly to this Build Guide. If you want to suggest a specific build option for this guide, submit a content correction or have a general inquiry, send me an email.
Error: Contact form not found.
Disclaimer: Throughout this guide, all guidance, building techniques and other information are based on my own experiences of converting a cargo van into a Tiny House on wheels. This guide is only for informational purposes; always build according to local and national standards. Be aware that such a project is expensive, requires a substantial amount of broad knowledge of building techniques and involves more work hours than you can imagine. Besides of hitting a finger with a hammer, much more serious harm can be done when you work with 12V/120V electrical systems, propane installations, power tools, etc. Tapping into the vehicle’s own systems can also damage its functionality. Get professional help where needed; never take any risk!
References:
1image from Ourkaravan Van Build