
Mod: Insulated Floor – Part One
Noise reduction in cargo vans is sometimes important, as these vehicles are built differently then passenger cars. The wheel wells are the obvious place to tackle the main source noise production. Limiting it, has some merit, but I see it as only a minor inconvenience, where driving is such a minimal part of the RV experience.
Project Insulated Floor Content
Tie Downs & Wheel Wells
Paper Plywood Templates
Floor Insulation
Fasten Insulation With Glue
Spray Foam Application
Plywood Installation
Hardware & Soft-Ware
What You’ll Learn:
- How to remove tie downs in a Ford Transit.
- How to soundproof the wheel wells.
What You’ll Use:
- Wrench & Socket.
- Utility Knife.
- Tape Measure.
- Rubbing Alcohol or Alcohol Swabs.
- Small Wall Paper Seam Roller.
- Window Screen Roller.
- Hand Broom.
- Optional:
- Large J-Roller.
What You’ll Need:
- 1 Roll of Peel & Seal – 6″ x 25′.
Approximate Duration For This Project: 3 hrs.
Considerations
To me, the tie downs are only useful to transport and secure goods in your van, so removal is obvious as they interfere with the rest of the interior. Some use the threads in the walls, that hold these tie downs, to secure the plywood sub-floor with the help of a few angled fasteners. I prefer to secure the sub-floor directly to the metal floor of the cargo area.
Overall, I don’t regard the Ford Transit van as overly noisy, but the rear wheels produce most of that, especially when the tires throw small road debris against the wheel well.
The van already comes with a very limited amount noise reducing materials on the interior roof, that is supposed to minimize sound transmission through vibration. The same is intended here for the wheel wells.
Later on during this conversion, we will apply regular ‘heat’ insulation materials throughout the cargo van that will also help to reduce the overall noise levels.
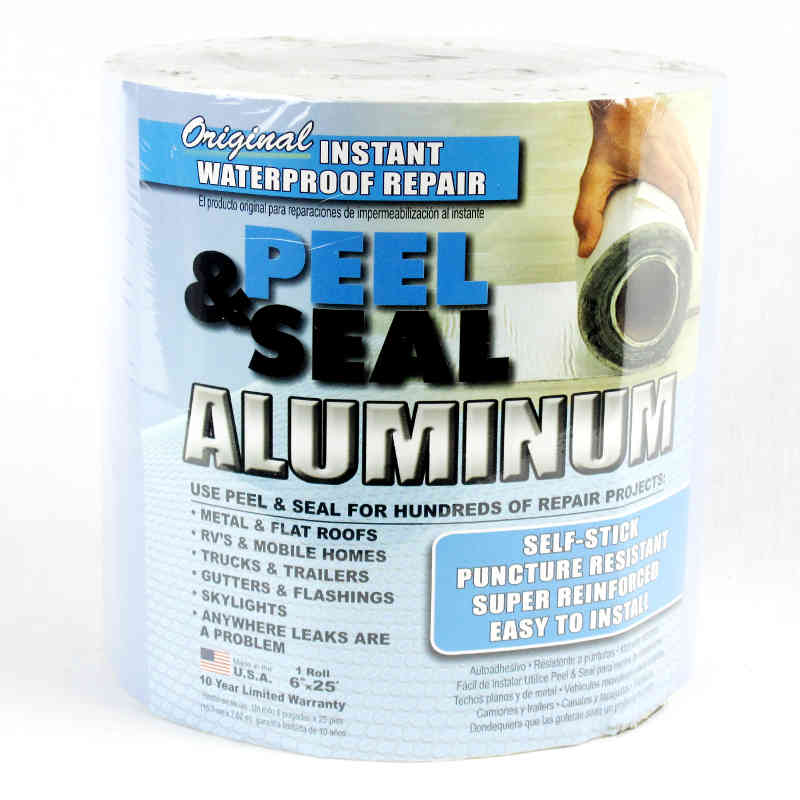 The choice of Peel & Seal (a roofing material) is based on one of the principles of this entire project to create an inexpensive conversion van and on the generally, positive feedback of other DIY upfitters. Sound deadening materials like FatMat are approximately four times more expensive and could be used instead without a substantial increase in cost. If you want to apply it throughout the van, it will become a costly proposition.
Some complain about fumes that would disappear in days or weeks, but I haven’t noticed any of that.
Tie Downs & Wheel Wells
Gather all the tools and materials before proceeding. Regularly fit the materials, to avoid costly mistakes.
- Use a wrench and socket to remove all nine tie downs from the cargo area of the Ford Transit.
- Brush clean the area of the wheel well you’re working on.
- Clean the surface with some rubbing alcohol or alcohol swabs.
- Cut a piece of Peel & Seal to the appropriate length.
- Try to use every bit of leftover. That’s how I succeeded to do both wheel wells with one roll, but barely!
- Work from bottom up.
- Remove only a short piece of backing at a time.
- Then press firmly and use a roller to set it in place.
- I use a window screen roller to press into every nook and cranny.


Conclusion
Removal of the tie downs is simple and quick. The application of the Peel & Seal to the wheel wells needs a bit of patience, but anybody can do this.
The materials for this part of the project, where acquired locally and the total cost was about $16.00.
Other projects of this Van Conversion:
- Mod 1: 12V OUTLET TO DUAL USB
- Mod 2: BACKUP PARKING SENSOR
- Mod 3: CABIN CURTAIN
- Mod 4: INSULATED FLOOR
- Mod 5: FLOOR VENT
- Mod 6: MURPHY BED/DESK
- Mod 7: CCP FUSES
- Mod 8: FRONT PARKING SENSOR
- Mod 9: CAR RADIO REPLACEMENT
- Mod 10: 4 CAMERA MOBILE DVR
- Mod 11: ROOF VENT
- Mod 12: 15 AMP HOOKUP CABLE
- Mod 13: SHOWER-IN-A-BOX
Disclaimer:
I’m just a DIY’er with a lot of common sense, but with some of the projects, I use some tools and materials, that require you to really know, what you’re doing. Always read the manual and consult an expert if you’re in doubt.
Outstanding work. Thanks so much for attention to detail and your fine videos. They are very helpful to all of us out there doing a van build. I think the new Ford Transit is a great van. However, for several reasons I ended up with a Ram Promaster 2500 (Fiat/Chrysler). Was a bit leery about them until I went to Italy on vacation recently and saw them used as ambulances and post office vehicles throughout the country. Now they are also used by our own post office. So, IMHP, both vehicles with stand-up room make for a great camping van. The advantage to Ford in the USA deals with the many dealerships with repair centers.
Thanks very much for your encouragement!
The videos are sometimes very detailed, as I try to focus on those van owners, who feel that they lack the ability to complete more complicated modifications, by reducing them to small and feasible mods. The photos and videos help them anticipate what the real task will be.
The Ford Transit, Ram ProMaster and MB Sprinter are the main van conversion models on the market today (I’m sorry …, Nissan NV and Chevy Express too!). When I had to replace my Dodge B-250 van last year, I also ended up choosing between the Transit and ProMaster. And it came down to the available options, before I made the decision.
The number of dealerships/repair shops is a significant factor for the Sprinter, less so for the ProMaster and I wouldn’t worry about that too much.
You chose your vacation destination wisely: Italy is the home of Fiat and as such has the home field advantage there. I think, if you stay with one of the big three here in the US, you can’t go wrong. Each make/model has its advantages and disadvantages, mostly based on personal preferences and less on capabilities.
Enjoy your van/conversion and if you are proud of one of your own projects, send me a few pics and a short description and I’ll post them on the website.
Van Williams
Hello. Do you do contract out? I still work full time and do not have time skills patience to do a van. please let me know. Thanks
Unfortunately, I don’t take orders for products or materials. I’m just a blogger, who writes about his experiences in converting a cargo van into an RV.
If you need help with woodworking projects, you may be able to find assistance from a good friend or at a local woodworking club.
Anyway, don’t let this keep you from building your own RV and to go out and enjoy all the beautiful places America has to offer.
Happy Travels!
Van Williams
Hey Van!
First off THANK YOU for sharing your knowledge and experience. I just picked up my Transit 250. What would you recommend for insulating the roof?
Hi Joe,
I appreciate the feedback; hope you’ll keep reading and view the videos.
While insulation (and ventilation) are sometimes controversial subjects, in my opinion the ceiling of a van is quite clear cut. I will use mainly up to two inches of Poly-Iso (the thickness of the ceiling cross members). I use dots of spray foam to stick it to the metal and to fill the gaps in between. You can fill the cross members with Thinsulate (expensive), fiberglass (cheap) or Denim insulation. Either one has its pros and cons.
If you have a high roof Transit and have height to spare, you may consider 1/2″ or 3/4″ of Poly-Iso, if you live or regularly travel in a colder climate.
Van Williams
Hi. Still in design and plan phase of new Ford Transit Med Hi/148″L RV (mostly) DIY reno. Will not live (but spend extended travel times) in this vehicle, and will lean toward warm (not snow country) climates. That said I need to insulate to both accomodate staying warm and staying cool for travel flexibility. I will not initially install an A/C (I won’t design myself out of the option however) and I will initially rely on my existing Mr. Buddy for heat. Maxx fan and T slide windows for better insulation.
>>> That said this is my insulation plan: Please feel free to offer suggestions and amendments as you see fit; the information and variables are overwhelming at times and I’m new to this all, despite heavy research;-)
1) Foam caulk and ‘stick and peel’ pads for sound.
2) R-Max on ceiling ‘and’ floor between ribs (with foam fill in) foil sides out???
3) Plywood ceiling and floor over ribs (vinyl on top of plywood on the floor).
4) Walls with Reflectix lined plywood over ribs only (thinking no R-Max since expectations lean toward needing cooling in the heat vs. warming in the cold?). leaving walls less insulated to let heat escape goes against my intuition… but is advised and many columns.
Please comment. Regards,
Hi Gee,
First the A/C. Lots of things depend on your individual setup and use of the vehicle. If you are primarily off-grid, it’s still virtually impossible to support an A/C. You may be able to support a regular RV A/C if you have a big Lithium battery bank (800Ah plus), lots of solar and preferably a separate alternator, otherwise you may consider a 5000-6000 BTU window A/C powered by a generator.
I’ve heard only good things of the Buddy heater; stick to the mid-size. One reason why I took propane out of the picture (my van is all-electric), is that it produces a lot of condensation. You should keep that in mind.
Now the insulation. That’s a long story. There are many opinions and nobody seems to agree. I’m only ‘qualified’ to speak about it in warmer climates. Insulation can only slowdown the heating and cooling of the interior of the van. When it’s hot outside, you’ll have to live outside. Much more important than insulation to me, is ventilation. I use a roof vent and a floor vent to create some natural convection or a slight breeze. Having a roof vent that can stay open during rainy weather (like the MaxxAir), makes a huge difference in moisture buildup. The only real solution to stay cool, is to follow the 75 degrees by changing elevation with the seasons. At 10.000 ft in summer and in the low desert in winter (or Florida, or S. California).
Insulation and colder climates is entirely different; extra floor insulation is important (difficult in a Medium Roof Transit for taller people), water tanks inside or with heating pads, water lines protected/insulated. Certainly good wall insulation. Possibly a heavy curtain between the cabin and the living area.
R-Max or Poly-Iso is relatively cheap, locally available and has one of the highest R-values. Generally you keep the foil on the size that needs to reflect the heat. Inside, if you want to keep the heat inside, outside if you want to stay cool.
Since vinyl is generally light, I would lay the floor and cover it entirely with vinyl, even under the cabinets.
The walls. You have to look at your lifestyle with insulation. If you spend a substantial part of your time in colder climates, insulation is a necessity. That same insulation may not perform well when it’s hot, but then again you will tend to live outside. Many talk about and use Reflectix. On it’s own, that product has close to zero R-value; you need to add at least a one inch air-pocket next to it, for it to have some insulation value. Using it on windows to keep the sun out, seems to work quite well.
There are many opinions about insulating a van and some products are better than others and more expensive. In the end you’re stuck with a vehicle with multiple doors and lots of areas that are open to the outside. Just getting in or out of the vehicle in winter, leaves the interior cold. I would not worry too much about insulation. Do it at least with some moderation and a lot of emphasis on ventilation. Do add more for winter exploration.
Feel free to ask more questions and good luck with your adventures 🙂
Van Williams