
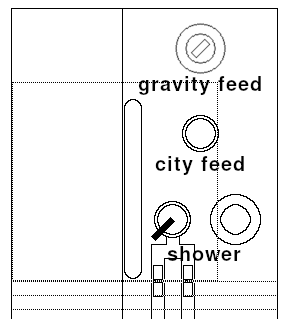
Water Tank Level
Optional – Installation of a simple water tank level.
Instead of a set of water level sensors in the water tank, I install an inexpensive alternative based on the principal of Communicating Vessels. With a hose connected to the tank, the water in the hose balances out to the same level as in the tank. No parts to service or repair.

Some of the accessories are also used in other parts of this water tank project and other projects of this build. It may be wise and cost effective to figure out in advance, how many of each you need for the entire build; you can also have a look at a Comprehensive Material List for most of the parts of this Fresh Water Tank Project.
Which Parts To Choose
This page may contain affiliate links that I am compensated for at no cost to you. Please check out my privacy policy for full details, and thank you for supporting the site!
BUILD GUIDE UPDATE
Be the first to receive an update, when a new Project is added to this Build Guide. I also include a monthly overview of newly posted videos.
Materials
Clear Vinyl Tubing
0.5″ ID hose
10 feet
Low Pressure Applications
Hose Clamps
20pcs – Stainless Steel Adjustable Clamps. Fit 1/2″ 5/8″ 3/4″ Hose.
Nylon Cable Clamp
0.75″ Diameter
Tools
DeWalt Router
1.75 hp
11 amps
corded
V-Groove Bit
0.5″ diameter
90 degrees
0.25″ shank
Water Tank Level Installation
Optional – Installation of a simple water tank level.
While this water tank level is entirely optional, with virtually no extra cost involved, you gain an easy way to monitor, how much drinking water is left in the water tank.
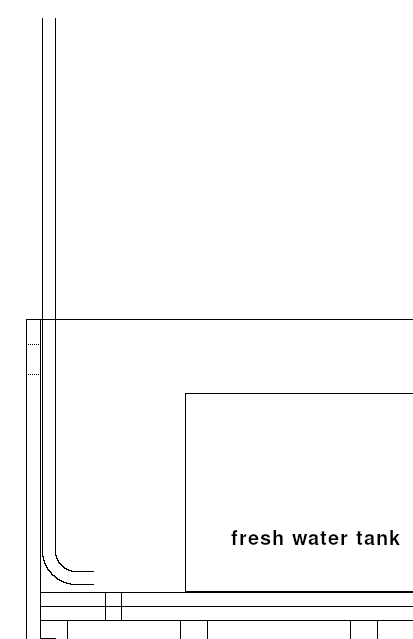
1. At the appropriate location, where it is still visible when the rear door is open, route a V-groove in the side panel of the base unit, the width of the outside diameter of the hose minus 1/8”, starting at the level of the bottom of the fresh water tank, upwards to the point where the vent line enters the top of the tank.
2. Insert the clear vinyl hose into the groove and cover it with the back slat, that has a grove of the same length. Attach the back slat with screws. The hose will run from the water supply line, through the groove, to several feet above the water tank.
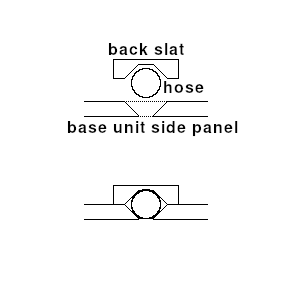
3. Attach the hose with plastic hose lamps.
materials
- 0.5” clear vinyl hose
- hose clamps
- nylon wire clamps
- wood screws
tools
- router
- v-groove bit
- screwdriver
QUESTIONS, SUBMISSIONS OR CORRECTIONS
The missing parts of the complete van conversion process are being added regularly to this Build Guide. If you want to suggest a specific build option for this guide, submit a content correction or have a general inquiry, send me an email.
Error: Contact form not found.
Disclaimer: Throughout this guide, all guidance, building techniques and other information are based on my own experiences of converting a cargo van into a Tiny House on wheels. This guide is only for informational purposes; always build according to local and national standards. Be aware that such a project is expensive, requires a substantial amount of broad knowledge of building techniques and involves more work hours than you can imagine. Besides of hitting a finger with a hammer, much more serious harm can be done when you work with 12V/120V electrical systems, propane installations, power tools, etc. Tapping into the vehicle’s own systems can also damage its functionality. Get professional help where needed; never take any risk!