

PREVIOUS: Passive Cooling
This discussion here is not about the solution to the great insulation debate among RV’rs, but my personal view of the many topics involved when insulating an RV. The decisions I take are based on my preferences, my budget, my location(s) and how I’m going to use the van, thus your selection will definitely be different.
I’ll focus primarily on boondocking, where temperatures are mostly unregulated; if you’re spending most of your time on campgrounds, you may opt for more or less insulation materials.
A highly contested subject is the use of vapor barriers in an RV. I regard the outside metal skin of the van as the main vapor barrier, others would like to add a separate layer. The skin of the van will always sweat and some airflow is needed, for this condensation and the existing moisture inside the van, to escape, otherwise it will lead to moisture, mold and rust problems. An extra vapor barrier doesn’t make sense.
At best insulation will keep temperatures regulated for a few hours, but eventually the heat will get in the van and the insulation won’t let it out. Ventilation does the same in hot weather. Winter mornings will be cold, because the same insulation is keeping the warmer outside air out longer. You have to balance its benefits and its drawbacks.
Windows may look like a liability, but in winter they can act like solar heaters, while giving ventilation in summer. In hot climates, some insulation with a good roof exhaust will keep the interior cooler day and night, but at some point it is going to get hot inside even with lots of insulation.
Staying cool starts with a light colored van, that will reflect more of the sun’s rays. And rather more, than less windows to help regulate the inside temperatures during different seasons. Wear more clothes and use more blankets to offset colder winter temperatures.
With a medium roof Ford Transit, where height is critical, I’m inclined to minimize insulation, especially on the ceiling. I’m not willing to lose much interior space to insulation.
Many issues can be defined by identifying the major insulation areas around the RV:
 Floor
Floor
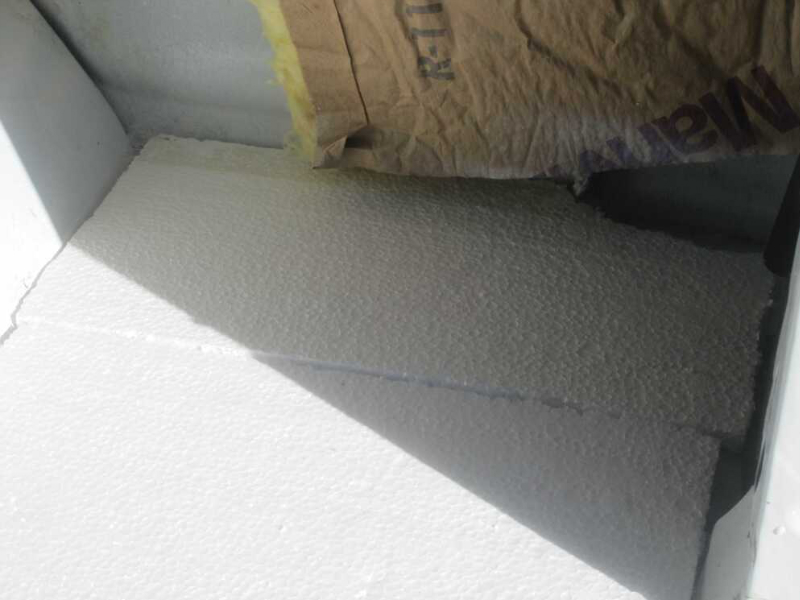
The floor is the least important and matters much less when it comes down to insulation needs. My previous cargo van had a ½ inch layer of foam board with ½ inch plywood on top and I wouldn’t hesitate to do that again. This rigid panel probably works better as noise reduction material than as insulation.
Walls
For a well-insulated van we have to protect it against conductive, convective and radiated heat transfer.
Polyiso panels often have a reflective barrier on one side. For that to work properly, we’ll use a 1 inch air gap.
 Install horizontal furring strips along the walls with a full inch Polyiso in between, with the reflective barrier facing the skin of the van. The additional 1 inch air space between the foam and the outside skin prevents heat transfer through conduction. The small air gap also limits the possibility of convection and the reflective barrier eliminates most of the radiated heat. You can add another 2 inch layer of blue jeans insulation, to give you even more protection against the elements.
For me, by applying only a single panel of Polyiso directly to the skin of the van, I maximize the interior space, while minimizing the negative properties of insulation (longer cooling off periods at night and colder mornings). At the same time, increased ventilation keeps me cooler during the day and more windows bring in more heat in winter.
In the end your choice will vary greatly, dependent on use, location and your conviction!
Ceiling
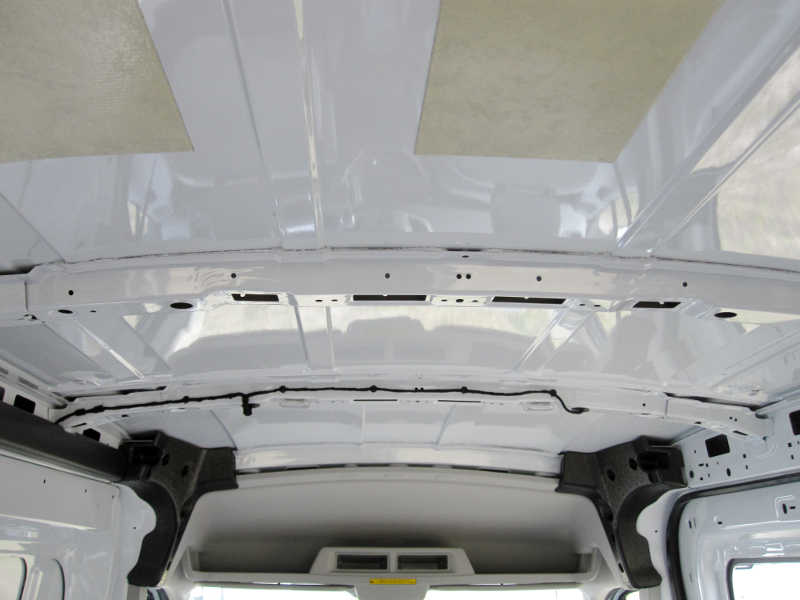 The roof gets to withstand the full force of the sun and would benefit most from an increased amount of insulating materials. Polyiso, complemented by an extra layer of blue jeans insulation could increase the R-Value to R-14.
In my van of choice, the medium roof Ford Transit, height is critical; the combined layers of insulation will have to stay within the thickness of the ceiling ribs, to maintain interior standing height.
Windows
With reduced insulation, the windows play an important role in heating the interior in winter, while keeping the van cool by means of ventilation. An extra layer of light blocking, heavy double-sided curtains minimizes heat loss/gain in summer, while opening the windows up in winter, will allow for the morning sun to enter and quickly reheat the cool interior.
Roof Vent
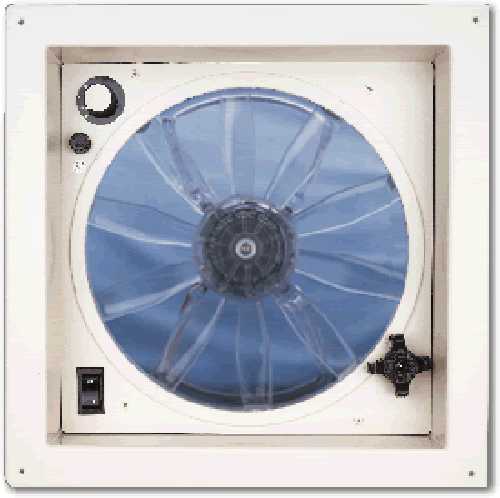 The roof vent plays a pivotal role in ventilation, yet at the same time is a major source of heat loss. It is exposed to the sun for most of the day, especially when the van is equipped with solar panels.
Two kinds of insulation will help mediate this.
- Use an insulated domed lid.
- Add a shade or cover to prevent heat gain/loss when not in use.
 Cabin Area
The windows in the front cabin could be treated with Reflectix. A better solution is blocking off the driver’s area with an insulated heavy curtain, separating the cabin from the payload area. The curtain would allow continued use of the swiveled passenger chair, while adding more privacy, stealth and insulation. It also reduces winter heating to a smaller interior area.
 Refrigerator
While not part of the insulation process to keep us comfortable, the fridge needs the same insulation and ventilation to work properly. An extra 2 inch layer of Polyiso can cut the energy use of a 12V Danfoss refrigerator in half and one or more built-in computer fans will improve ventilation greatly.
Insulation Materials
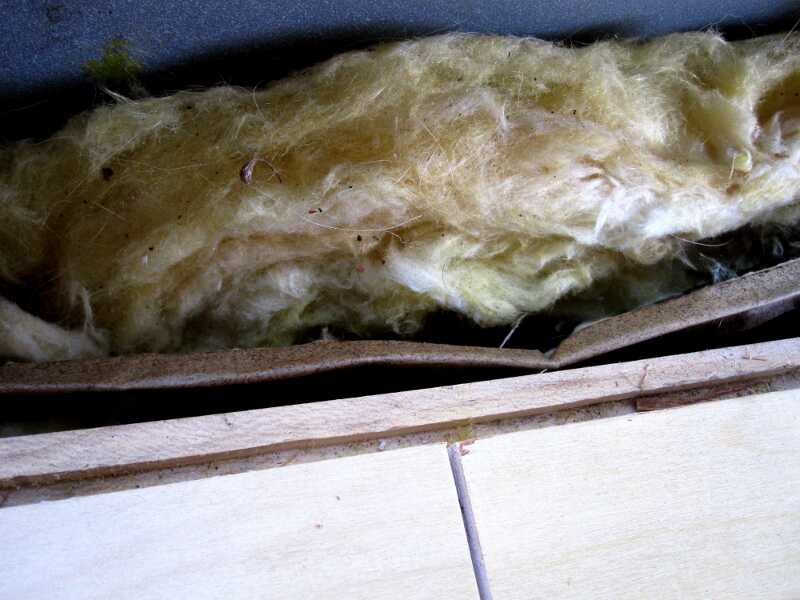
In addition to the items I described above, there are many more materials that can be used to insulate a van. Each has to be evaluated on its properties to decide its suitability for the location and climate where the RV is to be deployed. A good example is fiberglass use in the wet North-West is prone to absorb moisture and will lead quickly to mold and rust. To the contrary, my old Dodge van used it many years without problems, but was stationed in Florida and used mainly in the southern parts of the US.
Fiberglass
 Pros
Pros
- Price at $0.30/sf.
- Suited for dry climates.
- Non-flammable.
Cons
- R-3.5 at 1 inch thickness.
- Doesn’t insulate when wet.
- Not mildew resistant.
- Rodents love it.
- It settles and sags with movement.
- Unhealthy breathable fibers.
Reflectix
 Pros
Pros
- To prevent thermal heat gain.
Cons
- No good RV applications.
- NOT insulation, simply a thermal barrier.
- Fragile material, not for long time use.
- Less effective for heat retention.
- Bulky and difficult to store.
- R-Value of 1.
This material is not intended for use in RV windows. The heat radiated from it will continue to build and could break the glass or ruin window tint or rubber seals.
 Polyiso (Polyisocyanurate)
Pros
- R-7 at 1 inch thickness (much less at below 10°).
- Usually has a reflective barrier on one side.
- Price at $0.65/sf.
- Non-flammable.
 Polysterene/Styrofoam
Squeaks while installing, but quiet once in place.
Pros
- Price at $0.50/sf.
Cons
- R-4.3 at 1 inch thickness.
- Flammable.
- May damage wiring.
Spray Polyurethane Foam
 Pros
Pros
- Price at $2.50/sf.
- R-6 at 1 inch thickness.
- Good air barrier.
- Water vapor barrier.
- Reduces noise.
- Non-flammable.
- Closed cell foam.
Blue Jeans Insulation
 Pros
Pros
- Also acts as a noise barrier.
- Fire resistant.
- Fungi resistance.
- Reduces airborne sound transmission.
- Contains no chemical irritants.
Cons
- Price at $0.60/sf.
- R-3.5 at 1 inch thickness.
- It doesn’t expand well to fill the cavities.
- It can hold moisture.
Conclusion
No matter what kind of insulation you use in your project, the materials have to suit your needs and the climate you’re in. The wide choice of materials offers many opportunities to choose your level of insulation, its properties, like fire resistance or Eco-friendliness and its application methods.
At the top of my list are Polyiso (Polyisocyanurate) (affordable, high R-value, ease of use) and Blue Jeans Insulation (acoustic properties, safe product). At the bottom is Reflectix, often over-hyped and with few useful properties.
Moderately insulate your vehicle, but don’t over-insulate as your van will retain more heat for a longer period on those hot summer evenings and keep your van cooler on cold winter mornings!
I’m not an expert in insulation techniques and these are just my personal views on a complicated issue.

Download the complete Guide To Insulating Your RV
> “Winter mornings will be cold, because the same insulation is keeping the warmer outside air out longer.”
It seems you have a fundamental misunderstanding of what insulation is and how it works. On a winter morning insulation allows one to use a heater to quickly heat the interior space and not lose the heat to the outside. If a space is “underinsulated”, a heater will have to run more often to keep the space heated.
In an “overinsulated” space, if you ever do have a time when the outside air is warmer, just open the doors/windows. There are plenty of them!
The same observation works in reverse for cooling.
Thanks for your input, Sarah.
As I have stated, insulation in an RV, is a controversial subject among RVrs with widely different views about it. What makes it even more complicated is the type of vehicle, location and season of use.
These articles on insulation were focused on the upcoming conversion of my Ford Transit cargo van. The van will be equipped with factory all-around windows which are practically fixed and cannot be opened (except for 1 or 2 one inch slivers), which means no ventilation from the windows.
One of the activities I anticipate to do is boondocking in the desert South-West during the winter season. These are days with cool nights but rapidly warming in the early mornings, with lot of sunshine for my solar panels. I could be at these locations for multiple weeks without moving and without utilities and have to be careful with my energy use. Instead of relying on heaters, an early, rising sun can quickly heat up the interior of the van and EXTRA insulation can only make that more difficult.
Because of what a vehicle is and how it is built, insulation can only mitigate heat gain/loss and not prevent it. At the end of the day, it will be hot inside when it’s hot outside and vice versa. Only ventilation can reduce that.
Your view on insulation is appropriate under different circumstances, but more important, when it suits your needs, it’s the best solution!
Hey brother, doing our fourth van, 2015 transit 250 HR
I have been befuddled by insulation since beginning.
I have Foiled bubble wrap in a space in our hot living house in
Far West Texas, it’ ait’t the stuff, the ridgid with at least one side foiled seems the way to go, I’m wondering since we have
Ceiling vent fan if both side foil on roof migh be better, then one Side foil and denim in the sides. So that the roof reflects back in cold.
During cold and vent fan gets the hot air out. Sides benefit
From denim for one sided foil. For anti squeak and that air space you mentioned, the rigid stuff has to have an airspace,
I think that the foil/ bubble wrap glued to,inside steel is a bad Idea. We just got our transit HR in April and have just begun,
Would love to keep in touch and see what each other are experiencing. I just stumbled on awesome vents, and discovered a great floor intake, that is going to blow shit wide open, as well as self leveling bed system for the stealth groups. Simple cheep and easy. Lemme know if you want to bounce ideas, email: ***********@yahoo.com
FB: Sancho Verde, email is better.
If you’ve done a little research on RV insulation, you may have noticed as many opinions as there are types of insulation. That is because it protects against heat gain AND loss.
That means on a hot morning, it will keep your vehicle cooler, longer. That same night it will keep the heat in longer as well. Thus, insulation is only part of the solution: add some natural cooling and ventilation. What makes it more complicated is the tendency of the skin of the vehicle to “sweat” because it acts as a vapor barrier. That moisture needs a way out, to prevent rust, etc.
You have to choose insulation based on your own preferences and lifestyle. A dry/warm climate allows for different solutions than wet with cold and snow. But I don’t think there is a right solution.
This Reflectix type bubble wrap is quite popular now, yet I think, that it’s only use may be as a window cover. It has practically no R-value and and works only against radiant heat. Personally, I prefer to use only a moderate amount of insulation and put more emphasis on passive cooling and ventilation.
It’s the foil on insulation products that protect against radiant heat gain/loss, but only if there’s a small adjoining airspace.
As a floor intake, I’m currently researching metal blast gates for woodworking dust collection systems. Cheap and like they are made for the job.
Much success with your van and stay in contact!
Van Williams.
Good morning Van,
Any comments on the Lizard Skin ceramic insulation and sound control products as first steps before adding some form of cavity filler? http://www.lizardskin.com/car-insulation-products.html
Best regards,
Thomas
Dear G. Thomas Barnes:
I never heard of this product before and certainly have never used it myself. I’m always very skeptical, even to go as far as testing a product myself, despite it being widely in use with lots of positive users.
I have no opinion at all on the Lizard Skin ceramic insulation and sound control products, but I see no real scientific testing results and certainly no data on real-live application in vans/RVs.
Much is possible nowadays and much is expected, but often products that have proved themselves over the years are the better way to go.
I’ve researched insulation quite a bit, but have never encountered a van conversion, that only used this or similar product to replace the conventional insulation methods. To the contrary, most that dive into the insulation issues of vans and small RVs, tend to over-insulate with multiple thick materials.
Personally I think that the importance of insulation in van conversions is overstated. It is only a small part of a bigger picture, that includes ventilation and heat reflection. Insulation can only keep cold out and heat in for so long and at the end of the day, temperatures have equalized anyway. At this moment, I am still considering a high R-value PolyIso, supplemented by denim insulation for my new van.
Van Williams
Awesome site van! Im building out a promaster. First I watched the floor insulation videos. I’m planning to follow your lead there. Now I was interested to see you plan for wall insulation. I’m not fully sure I understand what you chose here. Is it that the polyiso is attached to the firring and 1/8″ plywood with the foil side facing the van wall but with some air gap space between? Then where does the blue jean stuff go? On the sides of the iso panel to fill in the gaps? Or maybe as an extra layer inside of the poly panel? Thanks so much! I think your ideas are much better than a lot of the other van build sites. Quick last question, on the ceiling polyiso the metal side would face down right?
Thanks for watching!
As you have a ProMaster, you may have a model with more interior height. If so, I would suggest adding an extra layer of insulation under the subfloor. I skipped that primarily because of the lack of standing height, but if you have enough of that, the extra layer will come to good use.
The insulation is a bit complicated. I’ve been postponing it, but now I’ll be working on it pretty soon. First, I hve an issue that may likely only apply to the Ford Transit ( VIDEO ), where condensation on the windows will automatically drip in to the side walls along the metal skin of the vehicle. The two front doors have drip holes, but not so in the walls. As condensation will happen sooner than later, I’m considering to add drip holes at the bottom of the walls. Keeping that in mind, I want a space between the metal skin and the insulation. The best way, I have found thus far, is by using Great Stuff spray foam and place ‘dots’ of it on the skin and press the insulation onto it; gluing it together. I haven’t tried it out yet, but it seems to work. I will try to keep the Poly-Iso panel just a tad separated and fill in those gaps with the Great Stuff. The Denim could be added on top, increasing the R-value and adding some noise reduction. The Denim works better too in crevasses and hard to reach places. As the Denim is more susceptible to moisture, I would keep it away from the skin.
Usually, Poly-Iso comes with metal foil on both sides; one printed, the other not. The reflective properties of the unprinted side have some additional value by reflecting heat. So, you would put that on the side where you want to keep the heat. That means, if you want to keep it warm in winter, on the inside of the vehicle; if you want to keep it cool, towards the outside of the vehicle. But you can’t have it both ways 🙂 I would not worry to much about it.
Good luck with your van!
Van Williams
Thank you for sharing, I find your ideas solid!
Hi Laura,
Thank you! More is on the way 🙂
Van Williams